From Screen to Scene: Your A-Z Guide to Turning SVG Files into Real-Life Products
Have you ever scrolled through stunning SVG designs, imagining them adorning a custom T-shirt, a unique mug, or even a personalized home decor piece? The good news is, turning those digital dreams into tangible realities is far more accessible than you might think! At Kukaiart, we're passionate about bridging that gap, and in this ultimate guide, we’ll walk you through every step of transforming SVG files into incredible physical products.
What Makes SVG Files So Special for Physical Creations?
Before we dive into the "how," let's quickly understand the "why." SVG (Scalable Vector Graphics) files are the undisputed champions for physical product creation due to their unique properties:
Scalability: Unlike pixel-based images (like JPEGs or PNGs), SVGs are vector-based. This means you can resize them to any dimension – from a tiny decal to a huge banner – without any loss of quality or pixelation. Sharp lines, crisp edges, every time!
Editability: SVGs are made of mathematical paths, allowing you to easily edit individual elements, change colors, or combine designs in compatible software.
Compatibility: They play nicely with most cutting machines (Cricut, Silhouette, etc.), laser engravers, and design software, making them incredibly versatile.
This inherent flexibility is precisely what makes Kukaiart's SVG collection a goldmine for creators and small businesses alike.
The Essentials: What You'll Need to Get Started
Before you embark on your creative journey, gather your tools. Don't worry, you might already have some of these!
Your Chosen SVG File: Naturally, this is where your design journey begins! Browse Kukaiart.com for high-quality, unique SVG files.
Design Software:
Free & Powerful: Inkscape (excellent for vector editing).
Paid Industry Standard: Adobe Illustrator (for advanced users).
Cutting Machine Software: Cricut Design Space (for Cricut machines), Silhouette Studio (for Silhouette machines). These are usually free with your machine.
A Cutting Machine (Highly Recommended):
Cricut Machines (Explore Air 2, Maker, Joy): Popular for their versatility and user-friendly interface.
Silhouette Cameo/Portrait: Another leading brand, known for precision cutting.
Other Vinyl Cutters: Many other brands offer excellent cutting capabilities.
Blank Products: Think T-shirts, mugs, tumblers, wood signs, canvas bags, keychains, etc. The possibilities are endless!
Transfer Material (Depends on Product):
Heat Transfer Vinyl (HTV): For fabrics (T-shirts, hoodies).
Adhesive Vinyl: For hard surfaces (mugs, car decals, signs).
Sublimation Paper & Ink: For specialized prints on coated items.
Tools & Accessories: Weeding tools, transfer tape, heat press or iron (for HTV), measuring tape, scissors, lint roller.
Step-by-Step: Bringing Your SVG to Life
Let's break down the process into actionable steps. For this guide, we'll focus on the most popular method: using a cutting machine with vinyl.
Step 1: Download Your SVG File from Kukaiart.com
Once you've purchased your desired SVG, download it to your computer. Most files come in a zipped folder, so you'll need to extract them first. This usually involves right-clicking the zipped folder and selecting "Extract All" or "Unzip."
Step 2: Open and Prepare Your SVG in Design Software
Open Your Cutting Machine Software: Launch Cricut Design Space or Silhouette Studio.
Upload the SVG:
Cricut Design Space: Click "Upload" > "Upload Image" > "Browse" and select your SVG file. It will typically be recognized as a cut file.
Silhouette Studio: Go to File > Open and select your SVG. Note: For basic Silhouette Studio, you might need a paid upgrade to open SVGs directly. Otherwise, you can open the DXF version often included or convert the SVG externally.
Adjust & Customize:
Resize: Scale your design to fit your blank product perfectly.
Ungroup (if necessary): If your design has multiple layers or elements, you might need to "Ungroup" them to adjust colors or move individual parts.
Weld/Attach/Combine: If your design has overlapping elements you want to cut as a single piece (e.g., script fonts), use the "Weld" (Cricut), "Make Compound Path" (Silhouette), or "Attach" (Cricut) features.
Mirror Image (Crucial for HTV!): If you're using Heat Transfer Vinyl (HTV), you must mirror your design before cutting. This ensures it reads correctly when applied. For adhesive vinyl, you don't need to mirror.

Step 3: Send Your Design to Your Cutting Machine
Load Your Material: Place your vinyl (HTV or adhesive) onto your cutting mat, ensuring it's smooth and flat. Load the mat into your machine.
Select Material Settings: In your software, choose the correct material setting (e.g., "Heat Transfer Vinyl," "Adhesive Vinyl - Glossy"). This automatically adjusts the blade depth and pressure.
Initiate Cut: Click "Make It" (Cricut) or "Send" (Silhouette) and follow the on-screen prompts to start cutting.
Step 4: Weed Your Design
Once the cutting is complete, carefully remove the vinyl from your mat. Using weeding tools (hook or pointed tweezers), remove all the excess vinyl around your design, leaving only the parts you want to transfer. This is often the most satisfying part!
Step 5: Transfer Your Design to the Product
This step varies depending on your chosen vinyl:
For Heat Transfer Vinyl (HTV):
Preheat your heat press or iron to the recommended temperature for your vinyl.
Place your blank product (e.g., T-shirt) on the heat press/ironing surface.
Position your weeded HTV design (shiny side up, transfer sheet facing you) onto the product.
Apply even heat and pressure for the recommended time (check your vinyl's instructions).
Carefully peel off the clear transfer sheet (some HTV is "cool peel," some "warm peel" – check instructions!).
For Adhesive Vinyl:
Place transfer tape over your weeded design on the vinyl backing. Use a scraper to firmly adhere the tape to the vinyl.
Carefully peel the transfer tape (with your design attached) off the vinyl backing.
Position the design onto your clean, dry blank product (e.g., mug).
Firmly rub over the transfer tape to adhere the vinyl to the surface.
Slowly peel off the transfer tape, leaving the vinyl design behind.
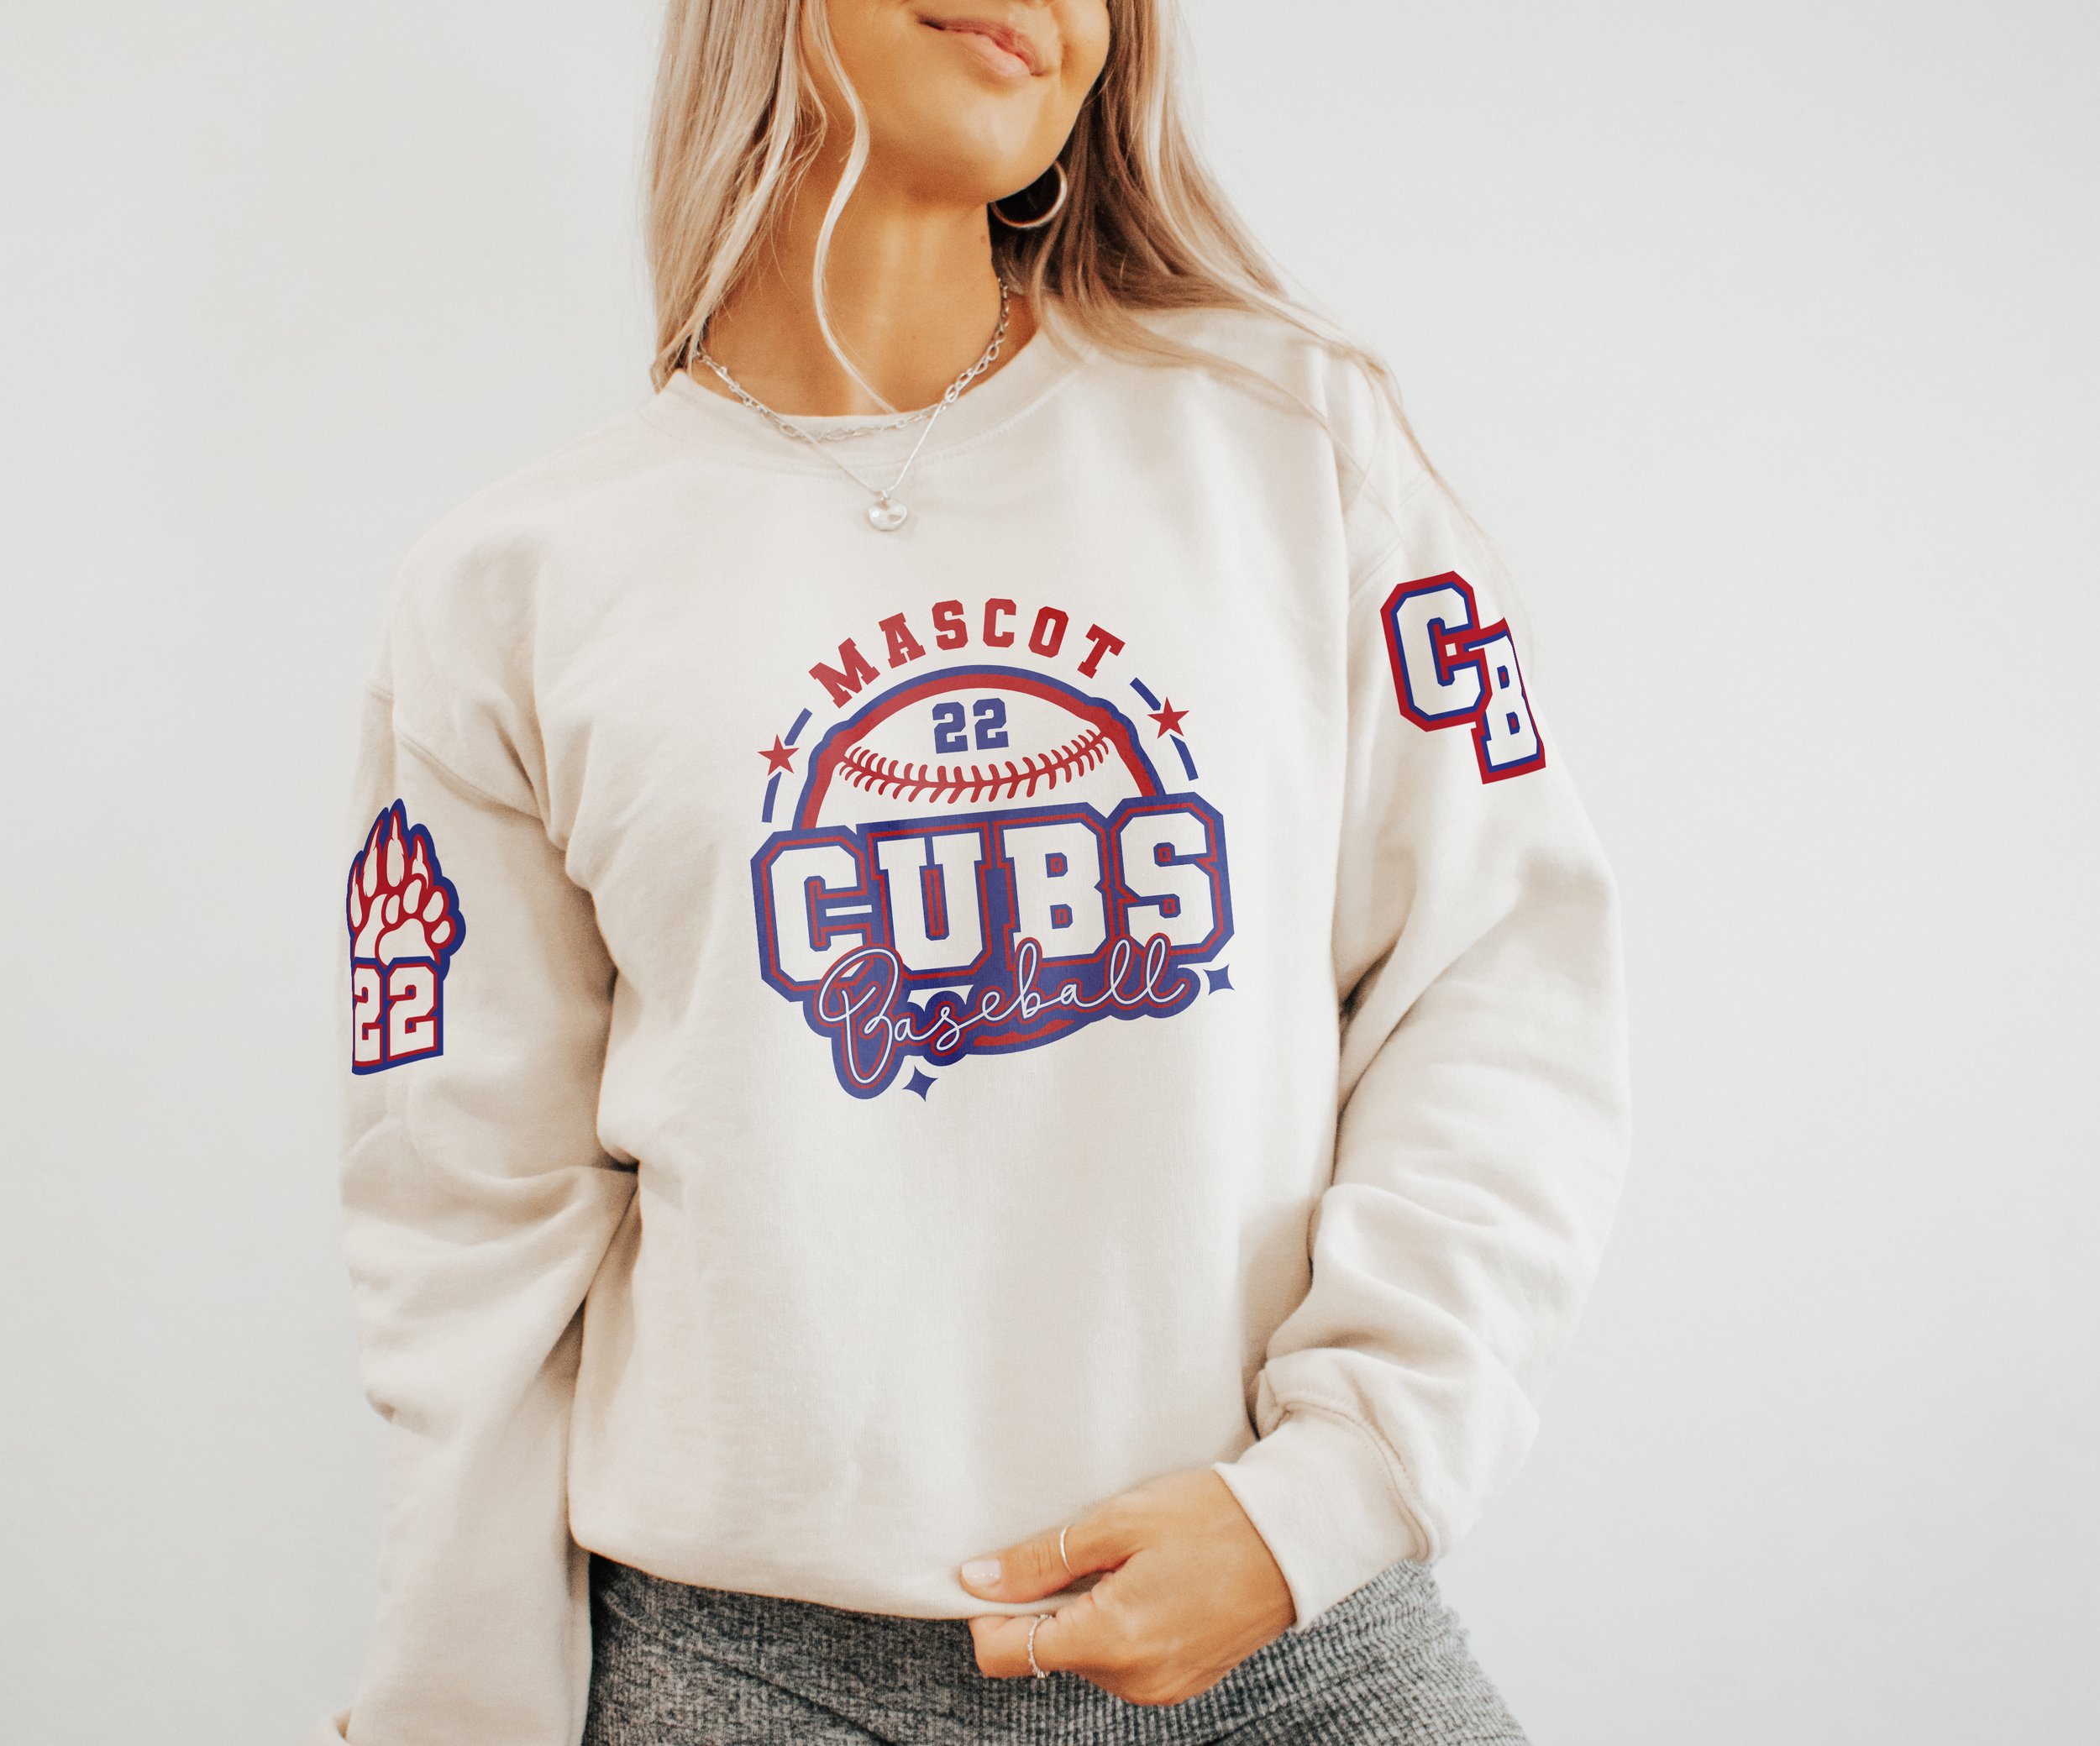
Step 6: Admire Your Creation!
And there you have it – your digital SVG file transformed into a stunning, personalized physical product!

Pro Tips for SVG Success:
Test Cuts: Always do a small test cut on a scrap piece of your vinyl before cutting your main design.
Cleanliness: Ensure your blank product is clean and lint-free for the best adhesion.
Pressure Matters: For HTV, consistent pressure is just as important as temperature.
Patience: Weeding can be intricate. Take your time, especially with detailed designs.
Experiment: Don't be afraid to try different vinyl types, colors, and blank products!
Turning SVG files into real-life items opens up a world of creative possibilities, whether for personal gifts, unique home decor, or even starting your own small business. With Kukaiart's versatile and high-quality SVG designs and this comprehensive guide, you're now equipped to bring your visions to life.
Ready to start crafting? Explore our diverse SVG collection at Kukaiart.com and let your creativity flourish! What will you create first?