Cricut Iron-On T-Shirt Tutorial: How to Make a Customized T-Shirt with Cricut

Do you want to make your own personalized t-shirt with your Cricut machine? If so, you will need some iron-on vinyl, also known as heat transfer vinyl or HTV, and a software program called Cricut Design Space. In this blog post, we will show you how to use these materials and tools to create and apply a customized design to a t-shirt with your Cricut machine.
What You Will Need
To make a customized t-shirt with your Cricut machine, you will need the following items:
• A Cricut machine (Cricut Joy, Cricut Explore 3, or Cricut Maker 3)
• A computer, tablet, or smartphone with internet connection
• The Cricut Design Space app or software
• A SVG cut file that you want to use for your design (you can create your own SVG cut file using a software program like Adobe Illustrator or Inkscape, or you can download free or paid SVG cut files from websites like Kukai Art)
Source By Jennifer Maker
• Iron-on vinyl in the color and type of your choice (you can find different types of iron-on vinyl, such as glitter, foil, holographic, or patterned, on the Cricut website or other online stores)
• A weeding tool or something similar to remove the excess vinyl from your design
• A t-shirt in the size and color of your choice (preferably made of cotton or a cotton blend)
• A way to press your vinyl onto your t-shirt, such as an EasyPress, a household iron, or a heat press
• A teflon sheet or a thin piece of fabric to protect your vinyl from direct heat
How to Make a Customized T-Shirt with Your Cricut Machine
To make a customized t-shirt with your Cricut machine, you need to follow these steps:
1. Open the Cricut Design Space app or software on your device and sign in with your Cricut account. If you don't have one, you can create one for free on the Cricut website
2. Create a new project by clicking on the New Project button on the top right corner of the screen.
3. Click on the Upload button on the left panel of the screen and select Upload Image. Browse your device and select the SVG cut file that you want to use for your design. You will see a preview of your image on the screen. You can rename and tag your image if you want. Then click on the Save button.
4. Select the image that you just uploaded and click on the Insert Images button. You will see your image on the canvas. You can resize, rotate, flip, or change the color of your image as you wish. You can also add text, shapes, or other images to your design if you want.
5. When you are happy with your design, click on the Make It button on the top right corner of the screen. You will see a preview of your design on the mat. Make sure to toggle the Mirror button on the left panel of the screen to flip your design horizontally. This is very important, as you want your design to appear correctly on your t-shirt. You can also adjust the position and size of your design on the mat if you want. Then click on the Continue button.
6. Connect your Cricut machine to your device via USB or Bluetooth and select it on the screen. You will see a list of materials that you can choose from. Select the material that matches your iron-on vinyl. You can also browse more materials or create your own custom material if you want. Then click on the Done button.
7. Prepare your iron-on vinyl by placing it on a standard grip mat with the shiny side down. Make sure there are no wrinkles or bubbles on the vinyl. Load the mat into your Cricut machine by aligning it with the guides and pressing the Load/Unload button. Then press the Go button to start cutting your design. Wait until the cutting is done and then unload the mat from the machine.
8. Weed your design by peeling off the excess vinyl from the mat, leaving only your design on the clear carrier sheet. You can use a weeding tool or something similar to help you remove the small pieces of vinyl. Be careful not to damage your design or the carrier sheet.
9. Prepare your t-shirt by preheating it with your EasyPress, iron, or heat press for a few seconds. This will remove any wrinkles or moisture from the fabric and help the vinyl adhere better. Place your t-shirt on a flat and heat-resistant surface, such as an EasyPress mat or a folded towel. Make sure the t-shirt is smooth and flat.
10. Place your design on your t-shirt with the clear carrier sheet facing up. Make sure the design is centered and aligned with your t-shirt. You can use a ruler or a tape measure to help you position your design. You can also fold your t-shirt and your design in half and mark the center with a crease or a pin. Then unfold them and match the center marks.
11. Cover your design with a teflon sheet or a thin piece of fabric to protect it from direct heat. Then press your design with your EasyPress, iron, or heat press according to the recommended settings for your material.You can find the settings on the Cricut website or on the packaging of your iron-on vinyl. Apply firm and even pressure and make sure to cover the entire design. You may need to press your design in sections if it is larger than your heat source.
12. Peel off the clear carrier sheet from your design while it is still warm or cold, depending on the type of your iron-on vinyl. You can check the instructions on the packaging of your iron-on vinyl to see if it is a warm peel or a cold peel. Be careful not to burn yourself or lift your design from the t-shirt. If your design is not fully adhered, press it again and peel it again.
13. Enjoy your customized t-shirt or give it as a gift. You can wash and dry your t-shirt inside out in cold water and low heat. Avoid using bleach or fabric softener.
Some Tips and Tricks for Making a Customized T-Shirt with Your Cricut Machine
Here are some tips and tricks to help you make a customized t-shirt with your Cricut machine:
• Always mirror your design before cutting it, as you want your design to appear correctly on your t-shirt.
• Always place your iron-on vinyl on the mat with the shiny side down, as you want to cut the vinyl and not the carrier sheet.
• Always weed your design carefully, as you don't want to damage your design or the carrier sheet.
• Always preheat your t-shirt before applying your design, as this will help the vinyl adhere better and last longer.
• Always cover your design with a teflon sheet or a thin piece of fabric before pressing it, as this will protect your design from direct heat and prevent it from sticking to your heat source.
• Always follow the recommended settings for your material, as different types of iron-on vinyl may require different temperatures, times, and pressures.
• Always peel off the clear carrier sheet according to the instructions, as some types of iron-on vinyl may be a warm peel or a cold peel.
We hope that this blog post has helped you learn how to make a customized t-shirt with your Cricut machine. If you have any questions or comments, please leave them below or contact us through our website. We would love to hear from you.
Happy crafting!
Refer to the project "Cool T-shirt for your Halloween" actually done by Kukai Art


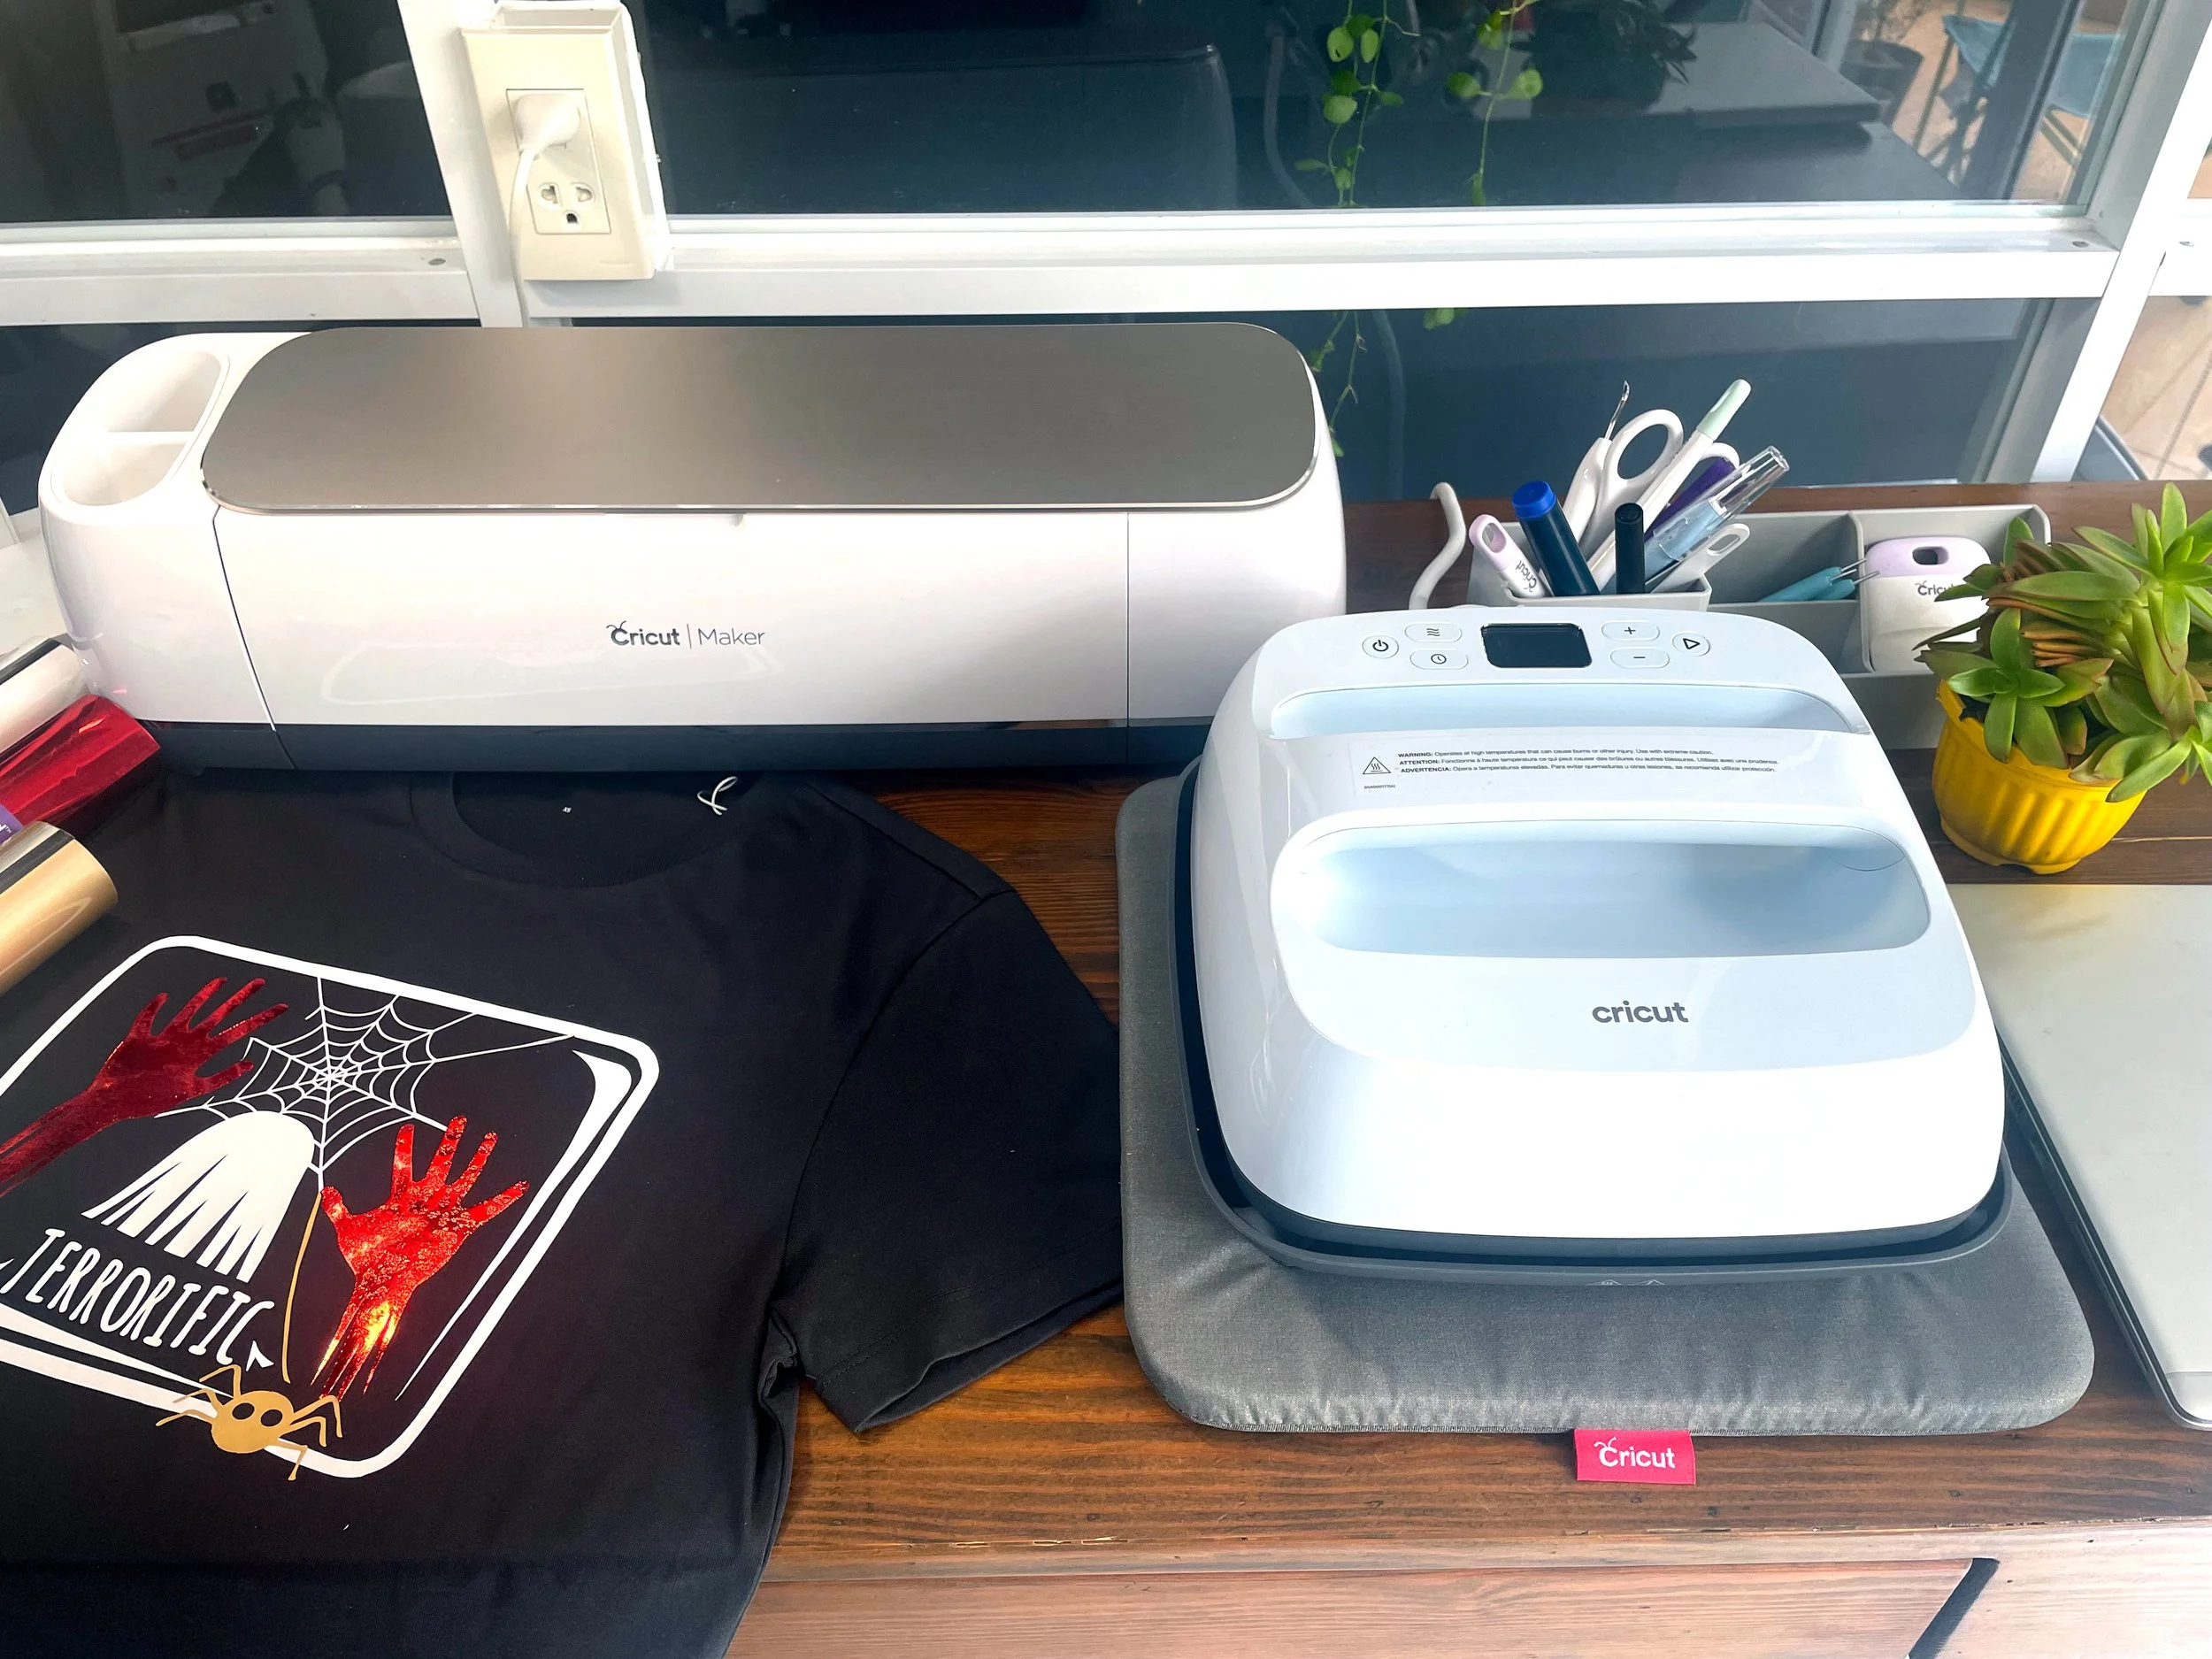
We cut images from iron-in to embellish on a black T-shirt
Finished print approximately 9’’ x 7’’ (23.5 cm x 18 cm) for size M T-shirt.
Machine tools
Cricut Maker or other Cricut cutters.
Cricut Easy Express 3.
Cricut Easy Pressing Mat
StandardGrip Machine Mat – 12’’x12’’
Weeder
A blank sheet of A4 paper (or thin towel or press cloth) to cover the cut image during heat transfer to reduce heat and adhesion to your Cricut Easy Press heating surface as we will have to heat 2 times for 3 layers.
Material
T-shirt 100% cotton
StrongBond Everyday Iron-on (White) # 6 size 12’’x 12’’
StrongBond Everyday Iron-on (Golden) 3 size 12’’x12’’
StrongBond Foil Iron-on (Red) #4 size 12’’x 12’’
Preparation
TO CUT
This image is editable, adding on text or other images. Just select Customize, then use the tools in the Edit panels. Don’t forget to save your changes before starting to cut to avoid loosing the changes.
To cut the white layer of print image, cut 1st time on the White Iron-on Sheet.
To cut the 2 red hands, cut the 2nd time on the Red Iron-on Sheet foil.
To cut the spider in golden color and put in wherever you want, you can also select the collection of spiders in library. Cut the 3rd time on the Golden Iron-on Sheet.
Notice: When you cut on iron-on, make sure that you Mirror the images and place the shiny side (clear liner) down on the mat. This will help you cut sharper and easy to remove small details of the cut-out.
Send your project to Cricut Maker and follow the prompts from Cricut APP.
Don’t forget to use your Weeder Tool to remove the unnecessary pieces of iron-on so just your design remains on the clear liner.
TO PRESS
Connect to your Cricut EasyPress.
Choose to set up new project and select relevant material.
Follow the same order like when you cut, starting from far to near.
1st press: white iron-on. Wait until it cools down, then peel the clear liner. But do not draw away.
2nd press: red iron-on for the 2 hands and yellow iron